Sew In Brighton Blog

 RSS Feed

Category: Student Sewing Projects

  1. How long does it take to learn to sew?

    Posted on
    Beginner classes and courses at Sew In Brighton
    Sewing is a skill that can be both enjoyable and practical. The length of time it takes to learn the craft with confidence, is dependent on various factors, including your level of commitment, the complexity of the projects you intend to undertake, and the resources accessible to you.

    For beginners, in our experience it usually takes just 2.5-5 hours of a class or course to get acquainted with the basics of using a sewing machine. This includes sewing up an actual useable item, excitingly! The process would involve learning how to wind a bobbin, pull the threads correctly through the sewing machine, thread a needle, operate a sewing machine, adjust the tension between top and bottom thread and sew simple stitches. These basic sewing machine stitches will include:

    • sewing straight lines to a set seam allowance (i.e. a specific distance from the edge of the fabric, as determined by the instructions for the item being sewn)
    • turning corners
    • backstitching to secure your stitch (no need to tie knots once done!) zig-zag stitching to stop edges fraying.
    • You may look at a sewing machine and wonder how on earth you're ever going to learn what all those different stitches are and how to use them. The good news is - you don't need to! You could sew for years with just the stitches mentioned above, which you will learn in the first few hours
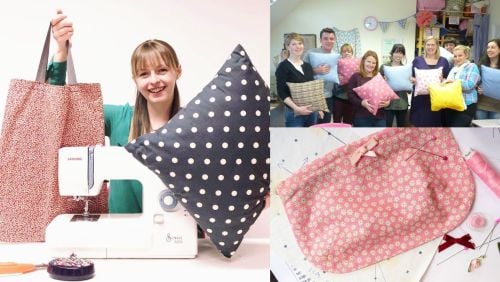
    • Part of the 'learn to sew' process should include cutting out and sewing simple item from start to finish e.g. a tote bag or an overlap back cushion (no zip yet!). It's a great idea for you to start your sewing journey with one these simple projects. It's much more interesting and satisfying to make a useful item than just practising stitches on scraps of fabric! Although you would do that first. Plus you get to see how a pattern is used - very useful for then going on to sew your own clothes. We particularly design our beginner projects so they have directly transferable skills to clothes making, such as hems, seams, zig-zagging edges and more. 

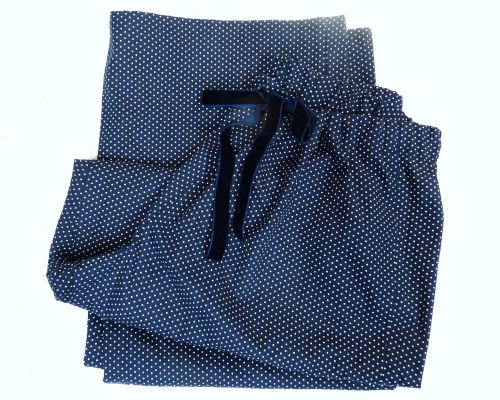
    To become proficient and confident in sewing, you would need to invest a small amount of regular time and effort into learning the skill. For instance, if you want to sew clothes or make more complex designs, you'll need to learn how to read and follow patterns. You can start with a very simple garment. Drawstring pyjama trousers (after the initial simple project as mentioned above) is ideal. The pattern constists of just two pieces - a front and back and you cut 2 of each. We actually teach you to make your own Pyjama trousers or shorts on day one of our Ultimate Complete Beginners Sewing Day! But first, we introduce you to your craft by sewing your own very simple drawstring sunglasses case. 

    pyjama trouser folded

    So really the answer to 'how long does it take to learn to sew', in our case at Sew In Brighton, would be 2.5-5 hours. That's the time it takes to learn the basics and sew up your first item. If you asked 'how long does it take to learn to sew clothing?' We could arguably say 'one day'! At the end of the Ultimate Beginners Sewing Day, you will have sewn your first garment, even though you were a complete beginner to machine sewing at the start of the day. There are many simple pyjama trousers or pyjama short patterns online if you're sewing at home. A simple gathered skirt with an elasticated waist is also a great starting clothes-sewing project due to the lack of fitting on the hips and waist and no zip.

    In our experience, if someone is attending weekly sewing classes, they would expect to have learned to sew after a class or two and made a simple garment after 8 or so hours of classes (e.g. the pyjama pants or an elastic waist skirt). Items with zips could be next - a zip purse or a zip A-line skirt. So within ten to twelve 2.5-hour long weekly sewing classes, you could easily have made a cushion or bag, a zip purse, pyjama trousers and a skirt! We have had students make a cushion and then go straight onto a dress, but it is hard work for them. We recommend a dress or short as a 4th or 5th project. If you have your own sewing machine at home, you could sew more items/garments - as you can be set homework by the teacher. Life often gets in the way, though, so many at first rely on the sewing classes to have the space to work on their new hobby, away from home distractions! 

    At Sew In Brighton, we have three types of learning session formats:

    1. Workshops or courses such as Learn to Use a Sewing Machine, the Ultimate Complete Beginners Sewing Day or Replicate Your Clothes where everyone makes the same thing or learns a set skill in a set number of hours/days. These are repeated every 1-6 months

    2. Mixed ability and mixed project classes for sewing and clothes making. You work at your own pace on your individual project over as many sessions as you need. Sew one of our free projects or bring your own along. These are held several times a week all year round with no breaks except for Christmas and New Year

    3. One-to-one lessons - your teacher is also your dedicated assistant with a keen eye on every step of your progress, so you can get through projects faster and with more accuracy. It is less social than the two options above, but really works for some people where group classes wouldn't so well. 

    Sewing and clothes-making skills and confidence are usually acquired gradually through consistent practice, experimentation, and guidance. You will make mistakes, especially as you attempt more advanced projects. But the great news is that making errors, having to unpick and re-sew is one of the best ways to learn - you're far more likely to do it the correct way next time!

    Sew Your own Alterations course. Brighton & Hove

    It is safe to say that the length of time it takes to learn to sew is pretty fast - just a few hours. To sew clothing with proficiency varies considerably from person to person. However, with patience, dedication, and access to the right resources, most people can become confident in their sewing abilities within a few months - or even a few weeks if they are sewing at home as well as taking regular sewing classes. Taking it step by step with the right choice of project progression is a huge help, to make sure you slowly grow in confidence and avoid overwhelm.

    Free sewing tips for beginners and beyond: If you would like to learn the basics of pinning, sewing hems, seam allowance, sewing jersey and more, head over to our sewing video tips page here.

    We can teach you to sew using a sewing machine in our sewing classroom by the sea in Brighton and Hove! Or help you take your current sewing skills to the next level. Head over to our sewing classes menu here for more details. Don't hesitate to get in touch with any questions or if you have a specific project in mind.

    Save 15% on classes by joining our email newsletter here
    We email 1-3 x a month with sewing tips, local sewing news, course launches, sales and more

    Thanks for reading! Kat - Sew In Brighton Sewing School
    Kat - Teacher Sew In Brighton

    Kat Neeser is the founder and owner of Sew In Brighton Sewing School. She has been sewing and making clothes for almost 40 years. Kat's early career from 1993- 2001 (after 4 years at fashion design school) was as a fashion designer and clothing manufacturer in Camden, then Islington in London. She was the founder of the fashion brand Wit & Wisdom (there was no internet then - only letters, phone and fax - so we can't link anything!). The label had a very successful shop in Hyper Hyper on Kensington High Street and a thriving worldwide boutique-store wholesale business. It later had concessions in Top Shop, Miss Selfridge and Debenhams. Kat was happy to leave the fashion industry and has been teaching sewing and pattern cutting joyfully in Brighton and Hove since 2008 
  2. Student Blogger: Hairdresser Paul Bally, Part 2

    Posted on

    Sit down with a cuppa and get stuck into Paul Bally’s next installment of sewing adventures. Check back for more updates, this post will be updated with new content every week.

    14th September 2021

    So today I wanted to get on with the hoodie, I’d cut the tissue pattern down a bit... well lobbed off the seam allowance and hoped for the best! Unfortunately this sent Kat into meltdown as what I didn’t realise that this is a common mistake with newbies and it makes the whole pattern become an odd shape with the dots and notches needing to migrate in a certain way. Anyway after measuring, measuring and measuring again Kat guided me on how to fix this issue and by the end of it we were happy with the adjustments. So now for surprise number two of the class... I wanted the two front panels quilted with a pattern fabric, some wadding which I had spent the night before trying to split as it was way too thick and the backing. Kat asked was this in the original pattern, where did I see this or was it in my head? To which I replied “I’m obviously a dangerous designer and yes it’s a vision in my head”. Out comes the fabric and I’ve now got to pattern match, another skill with more measuring and planning. Anyway I didn’t have time for any sewing as the planning and adjusting was very intricate. Homework I decided to try out my new walking foot attachment. What I realised that after having second hand sewing machine’s that always played up I had an irrational fear of changing the feet! I took the screwdriver, undid the nut and replaced it... with no drama and it works like a dream! So my fear was down to not really knowing how to use my machine properly so thanks to the team over the weeks I’ve realised it’s nothing to be afraid of. I long stitched the three layers of fabric together and did a couple of panels through to hold the wadding but I went too fast so unpicked them and will do them again over the weekend.

    9th September 2021

    Mel took the class. I carried on with the toile and finished it while making notes on the calico fabric to transfer onto the tissue pattern later. I’d saved the trousers for Mel as she had been with me for a lot of it. We did the waistband. The sewing machine got angry with me and shuddered due to the amount of layers coming together at the back seam.

    6th September 2021

    Kat took the class, I needed a break from the trousers so I started to make a Toile. I had previously cut out the tissue pattern and used calico fabric, cut it out (on my new cutting mat) and took it in.

    2nd September 2021

    So before the lesson my 10 meters of calico unbleached fabric arrived, so as a good student I pre washed it on 40 degrees and a 1200 spin... omg it was so creased, it looked like a dust sheet! I cut off a bit and re-washed it with no spin and ironed it wet, still creased! It then took me over an hour to iron the rest of it as best I could, time I’ll never get back! Anyway I pinned and cut out the hoodie pattern with my new cutting mat and rotary cutter (panicking I’d end up in A&E with severed fingers). The class was nice and relaxed, the welted pockets were misbehaving but I’d not sewn down the flappy points. Prepared the belt loops, unpicked six holes, poked them through and re sewn over the original hem. Mel decided she couldn’t live with my mismatched centre seam (along with Kat) and even though I said you wouldn’t see it as it would be covered (trying to blag it again) she said she would always know it was there... so as I’m a fan / professional at unpicking I whipped out my tool and well, undid the seam again! Why do it once when you can do it again, as my dad always used to say doing DIY.

    31st Aug 2021

    Feeling like I’m back at school this morning waiting for the teacher to mark my work lol!

    My model came with me to model the trousers and Kat said how nice they were looking! Phew!The waistband was the same tricky explanation, didn’t fit properly and the instructions wanted some crazy stitch and push through belt strap that we all agreed was going to be impossible to do with most suit trousers fabrics. Kat also has a new teacher with her and they went into problem solving mode to work out what had happened, whipped out a ruler and found the offending centimetre! Couple of repair stitches (forgot to tie them off) and a pin/ stitch top layer of waistband was on. Little buckle in the seam so will unpick this later and re do tonight. Before the end of the lesson I asked Kats advice on my next project as I want to use a fabric with a nap (direction of fur, fluff, cord or something like that) and want to incorporate some quilting techniques for a sport’s hoodie. I feel after these two technical pieces I need something quick, simple and bright. (the shorts will have to wait as the weather has gone cloudy and cold) Lots of pics etc, thank you for today! Really enjoying the difficulty level.

     6B043110-E534-4FFB-BFF3-0F726AF667BF307ED23D-B970-4B82-9FF8-1E50D6482D8B

    26th Aug 2021

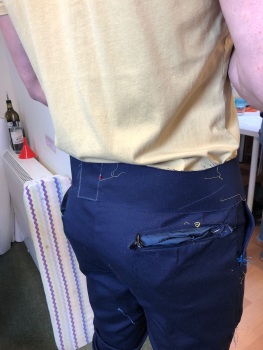
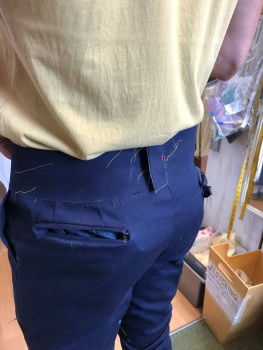
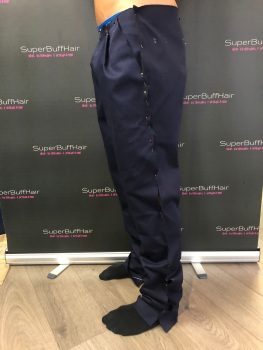
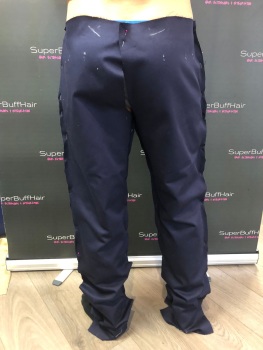
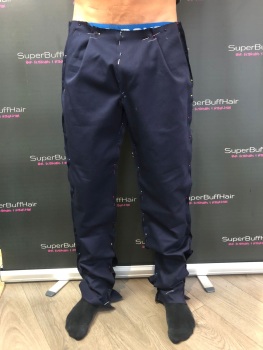
    Love these evening stitch classes! Had Phil again tonight. These suit trousers are proving to be a bit complicated (for me anyway) I did the seams to close the leg and the bottom area. At last some easy seams! Well my excitement and joy didn’t last long as my model (my partner) said “hmm., they are a bit baggy, they feel a bit like a boiler suit!” As the tears started to well... not really, I just took a sharp pin to the inside leg! I didn’t have the heart to tell him he has a suit jacket on the horizon! Phil was so professional and guided me to where to adjust for homework, showing me how to pin and mark on the inside and how to take the measurements. Homework was done over the bank holiday, I had to get this “boiler suit” image away. So after various seams these trousers went from boiler suit to riding jodhpurs to fashionable skinny leg! Making clothes is like the most difficult jigsaw puzzle, I think the meaning of life would be easier to solve. Anyway hopefully I’ve done the adjustments ok ready to do the waistband?

    IMG-20210831-WA0004IMG-20210831-WA0003IMG-20210831-WA0005

    25th Aug 2021

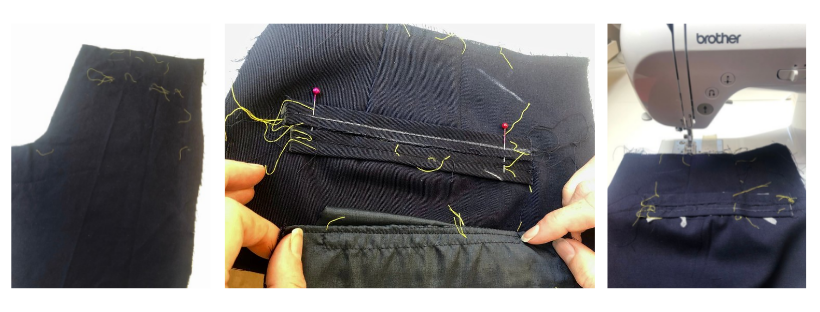
    The welted pocket saga continues! Mel had the pleasure again today. I’m sure the teachers secretly hope I've finished all the complicated bits lol! Anyway with lots of cutting, folding, unpicking, flipping, ironing, squishing, the welted pockets are done! Thank you to all that were involved!

    Paul Bally block post welted pockets 2 sewing sew in brighton tailoring

    24th Aug 2021

    Naomi today, full class with lots going on. It was quite technical with lots of matching up dots, Taylor tacos and notches? Welted pockets are on the menu today. I'm glad as I enjoy all the difficult bits of sewing, I think I am becoming obsessed with the construction of clothes! Most of the lesson I was confused, in a good way. Her words of advice were, “ it’s like magic when it’s done, but until you get there it’s hard to work it out” I’m sure Kat said something similar a couple of days ago.

    Paul Bally Blog post welted pockets sewing sew in brighton tailoring 

    23rd Aug 2021

    Just three of us today, which was just perfect as Mel had time to breathe and even lend a hand at unpicking, which I was truly grateful for. I feel I’m an expert in unpicking! I was attaching the zip today, the excitement of using a different presser foot was exhilarating! All these years I have struggled with the regular foot, not getting close enough to the zip and there was a specific foot for it! Again lots of pinning, folding and praying and voila, it is central.

    06231EC3-1195-4076-9ED7-02B007BC776A

    19th Aug 2021

    Today was slippy lining fabric day! This was to make the pocket lining/ bag/ sack. This gorgeous deep blue fabric is testing my patience, it is very floaty and likes to Frey. The stitch length needed to be adjusted to a longer one as it was pulling a little. Once you know this, sewing becomes enjoyable again.14B8036D-CAC5-433F-BC87-71D748C5B460A9D42D77-EAF7-4194-B1E3-FAD2D65EFB34

    18th Aug 2021 

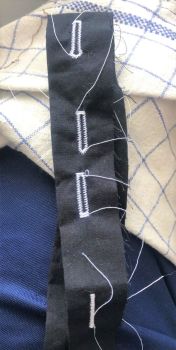
    So, update on the shirt, I’ve completely messed up the button holes at home!!! I’m still getting used to my new machine (I take it to class also) I thought I’d marked them correctly, did a test one and thought let’s do this and put the shirt in the opposite way and we’ll out of seven attempts only two were where I wanted them… have you ever tried to unpick a button hole? Me neither lol! 

    IMG-20210831-WA0006IMG-20210831-WA0007

    Anyway, rather than deal with unpicking I’ve started a new project, suit trousers. (The shirt is finished but the presentation will be later.) 


    Today Kat was in, I apologised before we started that I didn’t understand the instructions to which she replied “oh don’t worry you just have to read them slowly”.


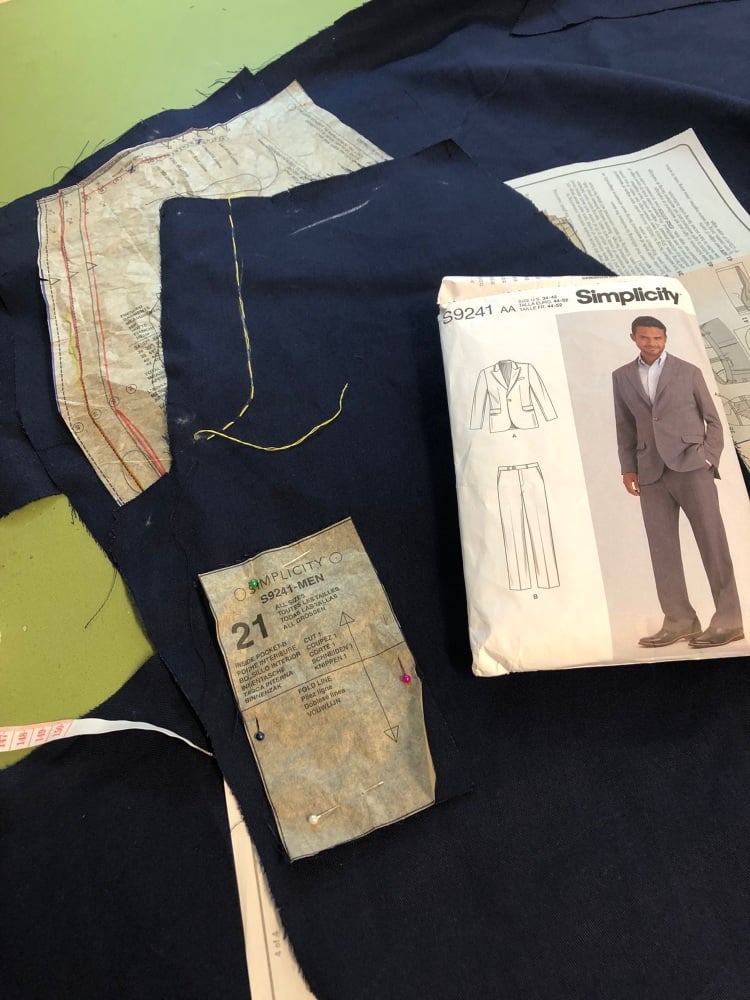
    Well after a few attempts she agreed that this was going to be difficult. She did make me laugh saying these “squiggles” here are “air” !?! I mean that wasn’t in the key code! Air!!! 


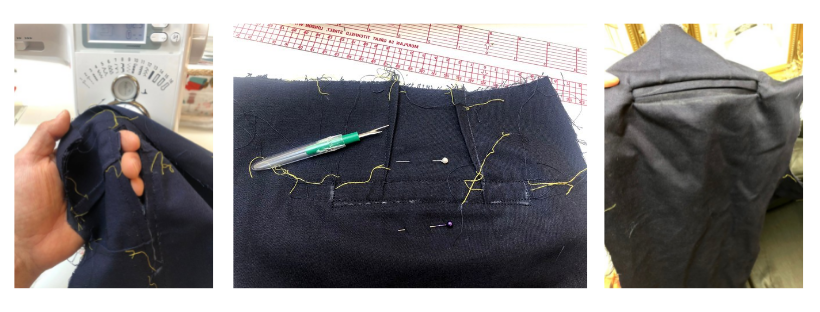
    So, this piece numbered 21 (with the air behind it) was actually a tiny pocket on the front waistband. Now that we know it’s a pocket the instructions seem really clear now!  

    IMG-20210831-WA0010


    As Kat said “don’t worry if it doesn’t make sense, it will all be revealed” I’m sure these sewing pattern manufacturers do this on purpose (or I’m just being stupid) 


    Again, I loved the class, there was one lady using the serger overlocker, and she was sewing like a true professional. When I grow up I want to be as good as her! And yes I’ve put this machine on my Christmas list also! 


    After the class I popped into Brighton to C&H fabric store to pick up some lining for the trouser pockets and Gutermann thread. Washed and dried the material ready for the next class tomorrow! 

  3. Student Blogger: Hairdresser Paul Bally, Part 1

    Posted on

    Hey,  

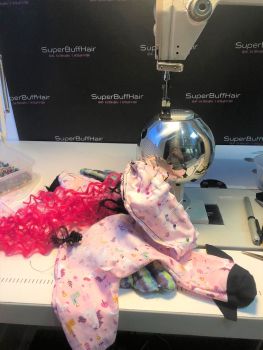
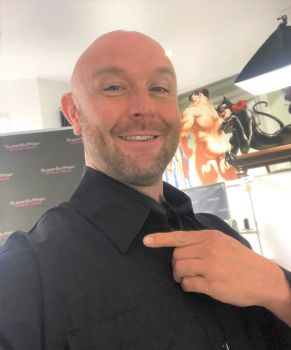
    I’m Paul and I’m a hairdresser who specialises in hair loss and extensions, I’m hand sewing hair extensions on a daily basis and also make hair pieces for clients on my fabulous industrial wig sewing machine (@superbuffhair on Instagram). 

    I’ve always been able to use a sewing machine and hand sew as my mom taught me when I was a child to make clothes for my toys and mend things. As the years went on, I started making curtains and cushion covers (they looked ok lol) and adjusting clothes. Although I had a basic understanding, I never really knew how to do it properly so one trouser leg would always be shorter which then ended up being shorts or shirts having bulky seams etc.  

    During lockdown I dusted off my sewing machine and worked my way through the pile of clothes I wanted to alter and repair… the ancient machine kept jamming and making all sorts of noises causing me all sorts of frustrations (my poor partner) this is when I discovered Sew In Brighton on Instagram and had my lightbulb moment of “let’s learn to do this properly for the sake of my sanity and my partner’s wellbeing”.  

    I contacted Sew In Brighton owner Kat on the 15th of July 2021 and arranged a free chat after the restrictions were eased to discuss face to face where I was and how I could improve.  

    Kat was so helpful, reassuring and got me booked in for my first session on the following Monday. She even organised my sewing pattern!

    Here’s how it went:

    19th July 2021  

    I arrived at Sew-in-Brighton ready for my class all nervous with my pattern and sewing box, entered the room and was greeted by Mel. Instantly she made me feel at ease, asked me what I was making to which I replied “a shirt, nice and difficult for my first project”.  

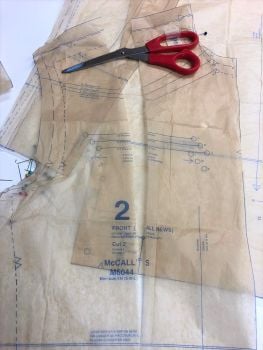
    There is a whole science to opening a tissue pattern up! It was massive! All these lines and squiggles everywhere, instructions using words I’ve never heard of!  

    I carefully cut out the template to the size required (sewing patterns always seem to make you a bigger size so don’t be shocked – the sizing hasn’t changed since the 1950’s) and then carefully pinned some of the pieces together and very gently tried it on, Mel then adjusted it accordingly to fit my arms and chest and showed me how to extend areas.  

    IMG-20210721-WA0002

    So, I didn’t get to do any sewing on this class as there was so much prep work! It’s all necessary to learn properly. You can’t just take a pattern, cut out the material and start sewing, I’m so glad I did it this way otherwise my garment would have been another uneven bulky mess.

    All the other stitchers were so lovely and were happy for me to ask about the different projects they were working on (camper van shade, bag, cushion, top).

    After returning hone I then ordered another seven sewing patterns of various clothes for my next projects lol! Haven’t even made one, now I think I’m a tailor/dressmaker!

    20th July 2021  

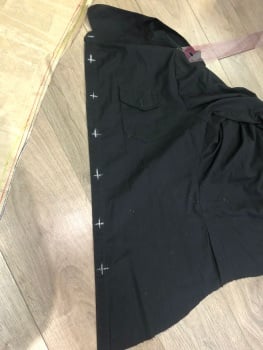
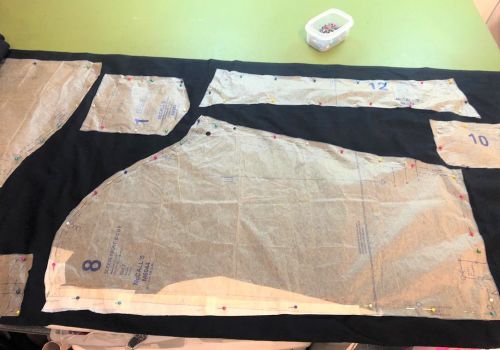
    Next day and I’m raring to go. I’ve got my pre washed fabric (black cotton) and Mel showed me how to fold the fabric the right way, selvages together to find the grain line (I think that’s right).

    I spent the lesson pinning the tissue paper cut outs onto my fabric, and asking lots of questions , so I’m sorry if I was being annoying, I just want to know everything and want to get on. As you can tell I’m impatient.  

    IMG-20210721-WA0004

    For homework I cut out all the pieces ready for my lesson the next day.

    21st July 2021  

    Please let me do some sewing! I’ve done all the prep, please please pleaseI’m so glad teacher Mel is patient, she gets everyone started and showed me how to do the pockets of the shirt. I honestly don’t know how anyone can decode the instructions on a sewing pattern!  

                 IMG-20210817-WA0002 (edited-Pixlr)          IMG-20210721-WA0005 (edited-Pixlr)

    There is a lot of ironing in making clothes, pressing edges over to make it easier to sew… and there it was, the sewing machine all plugged in and ready to do my first pocket flap! The feeling was incredible! Not because of the sewing but knowing why I was doing it this way. Once I’d stitched the edge (seam allowance) turned it the right way and pressed it Mel showed me how to do a buttonhole.  

    OMG doing button holes on the machine has changed my life! I want holes in everything now! We changed the presser foot, selected the correct setting and off it went, automatic and perfectly quick. I then attached the pockets and flaps to the front of the shirt Mel then showed me how to do a “French seam”, again I was OMG I love this!!! I did the top of the shirt and that was the end of the session.  

    When I got home I looked at my old relic of a machine and said “ sorry buster, but you can’t do what I need you to do anymore, thanks for all the years but I’m trading you in for a younger model

    Log onto eBay and press Buy it now 

    My sewing patterns have started arriving so I started cutting them out ready for the next project to save some time. One of my patterns was a unicorn toy so as I couldn’t get to a class for a week I embarked on a side project for my niece.  

    Unicorn Home Project

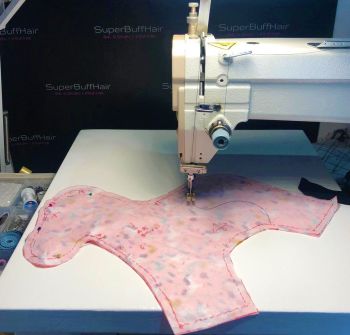
    So after two stitch classes I was confident enough to try making a toy from scratch at home on my own. I traced out the pattern of the unicorn (or horse if it became too much lol) pinned it to the material (pre washed) cut it and started sewing between my old machine and my industrial wig machine. 

    IMG-20210817-WA0009

    Again the instructions were difficult, jumpy and not very clear so there was a bit of unpicking, swearing and lots of mess! But seeing those tiny hooves melted my heart .  

    Who would have thought a toy would be so fiddly! Anyway I had trouble with the wings so took them to my next stitch class.

    IMG-20210817-WA0026

    2nd Aug 2021  

    Today I had Naomi as my teacher, I’d seen her before working on something so was pleased to see a familiar face, and she knew what I was working on… good job as I couldn’t find my instructions! Poor Naomi, I tested her shirt making skills to the limit! (I did find them at the end of the class underneath my sewing box lol!) 

    We went through the 2 part shirt sleeve with placket, every stage my mind is blown! How simple it is to do and just knowing how a shirt is constructed gives me so much pleasure, even though I never really wear them.  

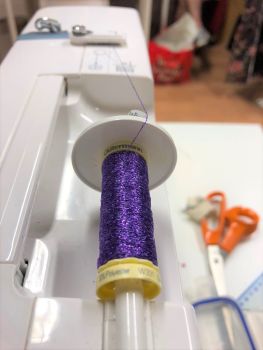
    I’d run out of my Gutermann thread so was finding it impossible using my cheap emergency thread that kept snapping while trying to do what I think are called running stitches. These are used to “ease in” areas of fabric where the arm hole is smaller that the sleeve opening for example. I said I would redo these at home, so for the remainder of the class I finished off my unicorn wings with Gutermann glitter thread.  

    IMG-20210817-WA0006

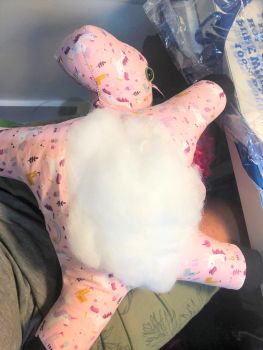
    Homework was redo running stitches and stuff unicorn wings… over an hour doing this! Next time I won’t do the seams so close together as the stuffing just wouldn’t go in without pliers, tail comb and a wig needle!  

    3rd Aug 2021  

    Naomi was in again today, she must have done her 10,000 steps in the class! Her attention to detail of everyone’s project was amazing - it would have been much easier if we were all doing the same thing! 

    I learned how to do a tailor’s tack stitch, again so simple. It’s used to mark an area instead of chalk which I was rubbing off with all the moving and ironing of the garment. I did a lot of watching of tissue fitting and adjusting on other student’s projects in the class, getting lots of inspiration for my next project.

    After the class I went onto Brighton to buy some more material and supplies, this hobby is getting expensive lol!  

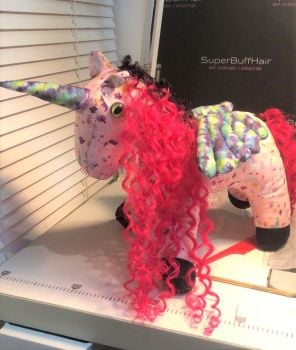
    When I got home, I finished sewing and stuffing the unicorn, made its hair nice and sent photos to everyone asking their opinion. They all said my niece will love it (not sure what the unicorn identifies as). 

      IMG-20210817-WA0020   IMG-20210817-WA0016   IMG-20210817-WA0011

    4th Aug 2021  

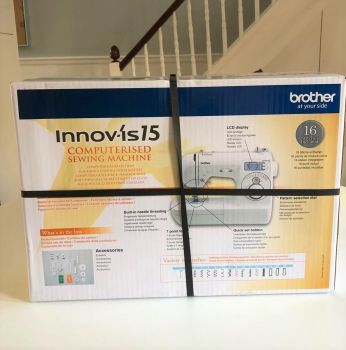
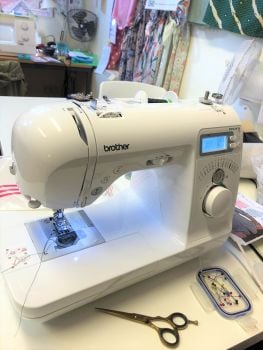
    THE NEW BROTHER INNOV.IS 15  NV15 arrives!!!  

                          IMG-20210817-WA0018              IMG-20210817-WA0019

    Literally does 3 different button holes! It’s so quiet, easy and shiny!  

    IMG-20210817-WA0029

    Went to visit my parents over the weekend, gave the unicorn to my niece and she adores it! She named her Pinky Sparkles and within an hour she could fly, read cooking books, sleep, eat sweets and play the guitar with her horn!  

    My mom has asked me to make her a cooking overall or apron, haven’t even finished my shirt and I’m already taking orders.  

    10th Aug 2021  

    Kat (Sew In Brighton owner) was taking the Stitch Class today, so I was trying to be on my best behaviour, showed off my new sewing machine, but unfortunately me and “easing in” didn’t get on very well lol! Something so simple on paper was so difficult to get right (never done this before) it would bunch up too much, then not enough, then look right then snag… Kat was very reassuring and helped me and showed me the blast it with steam techniques… so now I want a new iron at home. 

    Not much progress (being impatient again) but now that I’ve “eased in” for 2 hours I feel more confident how to do it right the next time. I think I’ll just do sleeveless outfits in future.  

    11th Aug 2021  

    Mel was back today, giggled over my ordeals and reassured me at the progress and improvement in the few classes. We did more French seams, took in the shirt body and arms and even managed to part attach the collar. Today my shirt looked like a shirt! I was so happy!  

    IMG-20210817-WA0010

    Homework is to finish collar seam and top stitch all the edges.  

    I loved watching the other stitchers making curtains, trousers, dresses and corset. It’s amazing how much we use material without thinking the work that goes into making things.  

    16th Aug 2021  

    So I am still working on my shirt but needed to line up my next project which is suit trousers…the jacket will be at a later date as it is just looks too complicated and confusing at the moment.  

    I’d already cut out the pattern on the largest size to save time in the class and brought my partner along for the tissue paper fitting. I pinned the tissue pattern together, got my “model” to try it on and Naomi helped me take out/in where needed, redrew the stitch lines and started to pin the pattern to the material.  

    It’s amazing how long this takes and also how not to presume that because you brought a pattern that you simply just cut it out and sew!  

    Before the class I started to make a tabard/ over shirt for my mother to wear when cooking (everyone thinks I’m a professional already).

    IMG-20210817-WA0037

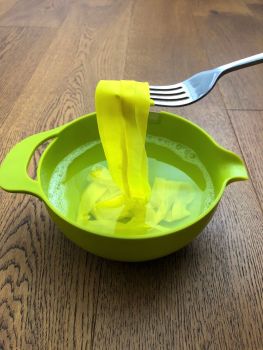
    Using my skills learnt in previous lessons I did french seams, zig zag edging and interfaced pockets. It is a fun piece using liquorice allsorts fabric with spam tinned meat picture pockets. The edging I’m going for yellow binding. See picture of how I prepared it.  

    IMG-20210817-WA0000

    Homework was to pin the pattern to the material.

    17th Aug 2021   

    I had Phil take the class today. Another teacher that knows how to construct a shirt inside out! After taking a look over what I’ve done he said ‘’right, let’s get this finished”. 

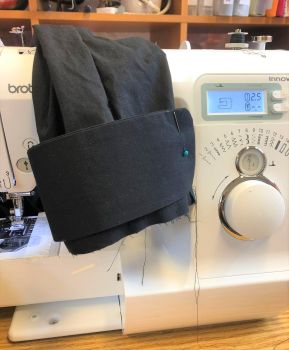
    First I trimmed round the shirt cuffs and stitched them round the edges, turned the right way and pressed. Next pin to the sleeves and add the pleat. I was so happy it was a pleat as I was not mentally prepared for easing in again lol!  

    Stitched the cuff to sleeve (my new sewing machine has a slow setting so perfect for going in circles)  

                       IMG-20210817-WA0036                 IMG-20210817-WA0035         

    Pressed the life out of the tiny crease before Phil could see, shame I can’t use the iron on my face to get rid of those creases!  

    Last thing to do is the bottom seam and button holes, I feel confident to do these at home so I can start the next project tomorrow. I was supposed to be away on holiday, but I’m so glad I’ve got this spare time to do these sewing classes close together.  

    Just before the end of the class Phil helped me decide on the right size for the shorts project after the suit trousers. 

    Look out for the next instalment as Paul continues with his project...  If you are interested in starting your own sewing journey take a look at the different classes and workshops we offer!


  4. Guest Blogger: Annie's Corset Project

    Posted on

    Class One: I've started a big project... A corset project! Corsetry has ways been something that has fascinated me and since picking up sewing I decided it was time to make one tailored to me.

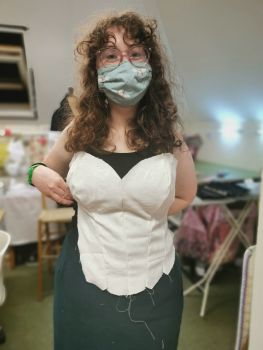
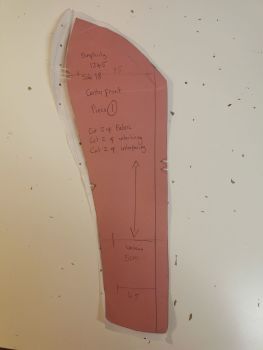
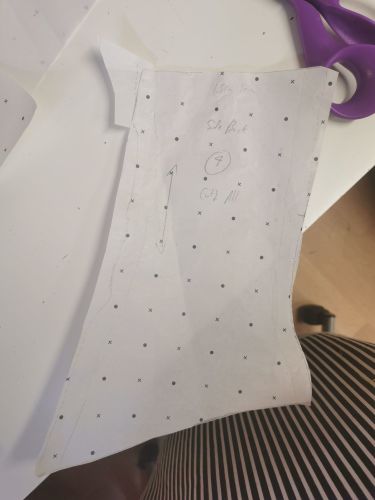
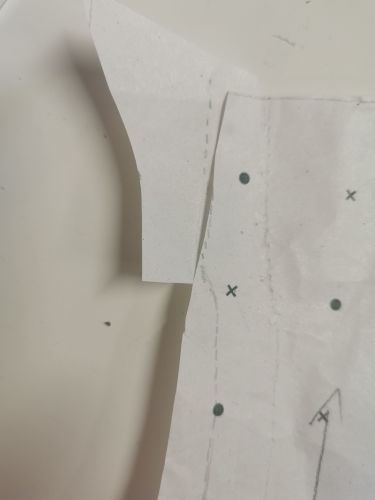
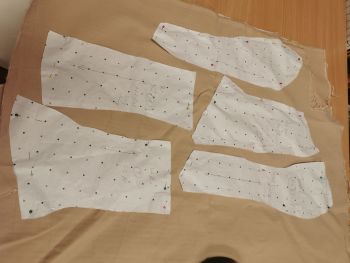
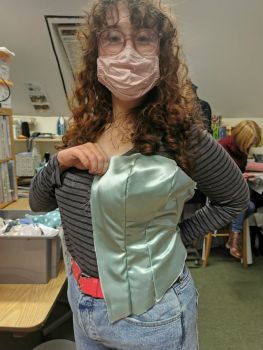
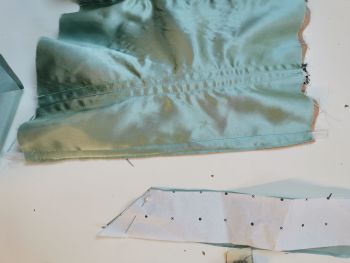
    The fit of it is what took up my first stitch class, fitting a corset and it's pattern which was available, to myself. Although the corset was pretty close to my size, there was a lot that needed changing! The bust had to be enlarged and the back panels shortened... And shortened... And next time they will be shortened again! As can (sort of) be seen in the picture, the pattern piece below the original one is how much it needed to be changed. All this can be tested for sure with a mockup, which is almost finished! The fit is already pretty good and I can't wait to finish the mock up, make any last changes, and get on to the real thing.
     
                IMG_20200921_205040     IMG_20200921_205145
     
    If you'd love to make yourself a corset in our classes, head over to our corset project page here to find out more
     
    Class Two: This time was more of the same, fitting the mockup! Since the corset has to fit my body perfectly, it's no surprise its taken me another lesson to get it right. It fits pretty well now, all adjustments have been made such as shortening the back panels, and I've started to adjust the pattern pieces (and sticking extra paper along the side where I didn't have enough space for the seam allowances!). 
     
            IMG_20200929_122858 IMG_20200929_122901
     
            IMG_20200929_113344 IMG_20200929_113354
     
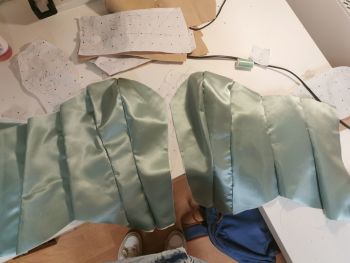
    Class 3 and 4: My corset has been advancing swiftly now! All my pattern pieces have finally been fully adjusted and the pieces themselves have been cut. I also ironed interfacing to the satin pieces to give them some support as they are quite thin. 
     
    IMG_20201005_195351                IMG_20201008_212347
     
                    IMG_20201008_204811IMG_20201008_212354
       
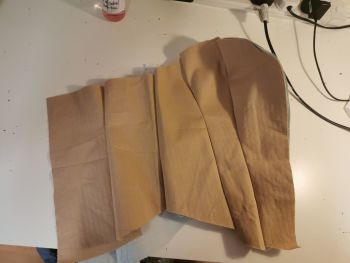
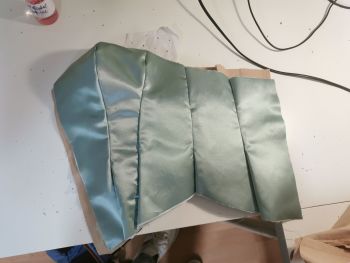
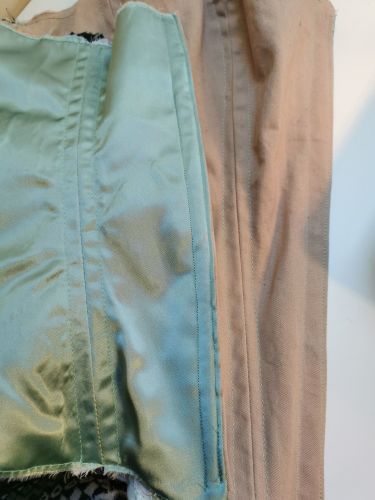
    And so it began... Sewing the pieces together! This part was quite daunting since the pieces have so many curved edges and I wanted to get it perfect. I moved very slowly at first, but my confidence definitely grew. I sewed the satin pieces first and by the time I reached the beige inner layer I was able to get them done in no time. And so both sides of theinner and outer layer have been sewn!
     
    Next comes adding the boning... To be continued! 
     
    IMG_20201008_212508
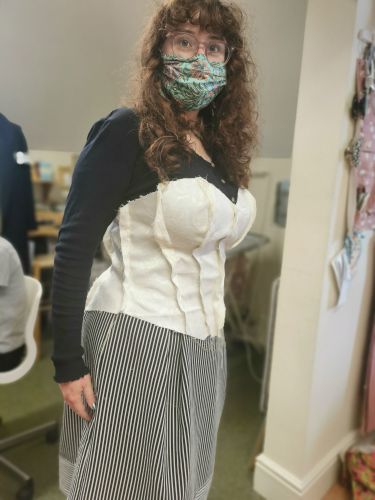
     
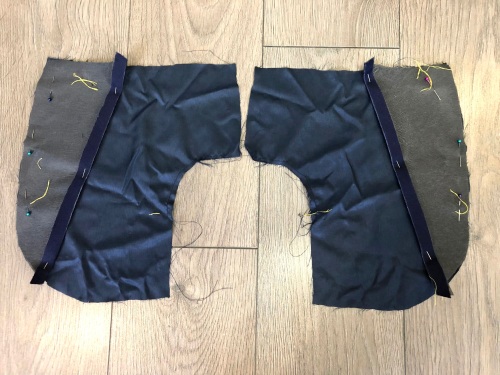
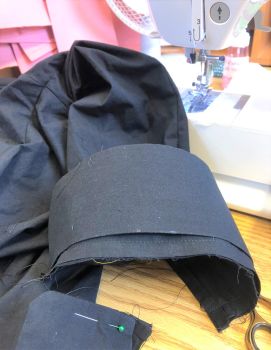
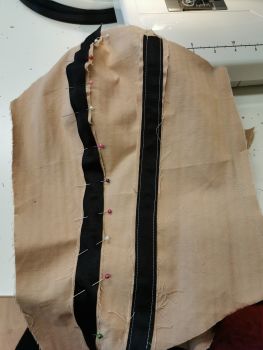
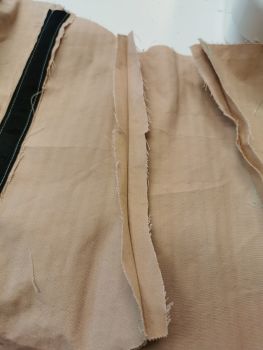
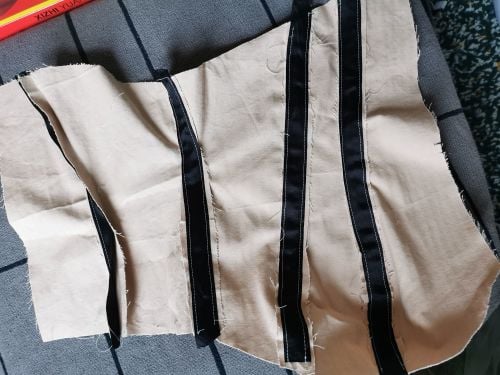
    Class 5: Now it's time to prepare for the boning channels! The boning channels are, of course, a vital part of the corset which gives it its shape and support. In order to create those my inner layer's seam allowances are ironed opened (this just makes it easier to sew later on). On the seam allowances I placed a black ribbon which will become a channel. For me, this requires many pins as the pieces are significantly curved and I don't want the ribbon moving about!
     
     
           IMG_20201020_114949      IMG_20201020_115000
     
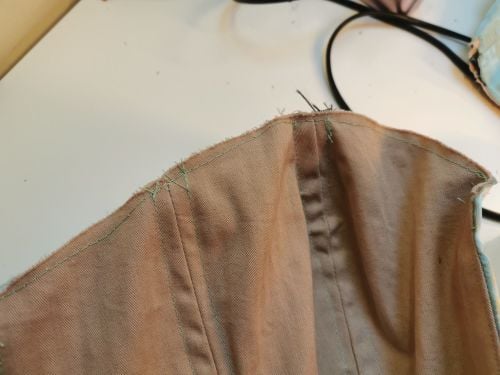
    My first attempt was more like three until I could finally work out the best way to sew it. At first I tried to sew from the front of the piece in order to achieve nice straight stitching on the outside. However this meant that my sewing on the ribbon was not straight. This means that the bones (plastic, of course) would not have been able to fit in the channels. The ribbon is fairly narrow as well, so precision is key. In the end sewing directly on the ribbon was the best choice and my previous straight stitches on the outside didn't end up too badly after all. My stitches are green since I accidentally bought so much green thread it would feel like a shame not to use it!
     
    The most difficult part was the seam of the most front pieces for the bust. It is so heavily shaped that I ended up having to move at a snails pace just to get it done! In the end I almost finished one side of the corset in terms of channels. Next time will be much quicker!
     
    IMG_20201020_163559
     
    .               
     "It's fair to say I'm happy that only one of the two layers has boning in it!"
     
    Class 6: Oh dear, we're going into lockdown again! So I am sad to say my corset will not be continuing for quite a while, especially since I'll hopefully be able to travel back home for December! But I am delighted to have been able to attend a final lesson before my long break from Stitch Classes.
     
    First I did a quick try on and Mel helped me by pinning the back panels to the size where the lacing would be appropriate. Then I gently cut off some extra excess from those back panels and folded the two layers inwards 2cm. I then carefully top-stitched the pieces together with a very small seam allowance.
     
    To get it ready for eyelets (and lacing) I needed to give it some extra stability with, you guessed it, some more boning! The boning needed to be very narrow to leave enough space for the eyelets, and none of the pieces were quite the right size. Luckily they are only plastic so I was easily able to cut one piece in half and sew it in. I did this the same way I did the busk pieces by sliding the boning in between the two layers and the using a zipper foot to get as close to the edge of the bone as possible and secure it in place.
     
    IMG_20201104_121524   IMG_20201104_121516
     
    IMG_20201104_113429.      IMG_20201104_122640_1
     
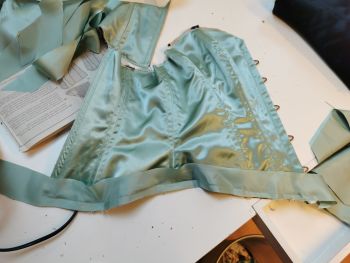
    Next comes the binding over the top. To make this easier I machine-basted the edges of the corset closed (like tacking but by machine) before attaching the binding. This way I don't have to worry about the pieces sliding around while I try and add binding as well! Then I managed one half of one binding... I have to wait a while to even get that done now! It's a shame that the Online Stitch Classes  Sew In Brighton is running during lockdown won't logistically work for me, I guess I'll have to be patient...
     
    To be continued! 
     
     
    If you would like to coming along to sewing classes during lockdown and beyond, checkout our online classes here
     
    Check back here weekly for updates on Annie's corset-making journey!
     
    Would you like to have a go at making your own corset?
    If so, find out more about our corset making project here and book online to our Stitch Classes or One-to-One Lessons.
     
     
  5. Student Jacqui Replicates Her Favourite Tunic Top

    Posted on

    I’m now onto my third project with Sew-in-Brighton (in Hove Actually) ….
     
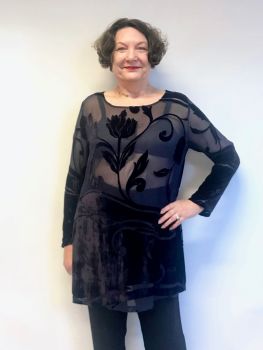
    Having already accomplished a 1940s style tailor-made dress from just a picture, and a converted kimono jacket, it was time to press on with my next (ad)venture - making a facsimile of my favourite Monsoon velvet devore tunic top.  I learned so many tips along the way, I've shared them below with you.
     
    In the first lesson, in order to create an accurate pattern,  I was instructed to fold my tunic in half lengthways and pin it out onto cross and spot paper.  

    IMG_9172   
     
    This proved to be tricky with the slippery fabric but lots of pins close to the edge helped to secure it in place ready for drawing round the shape.
     
    This procedure was then repeated with the other side of the garment and the sleeves.
     
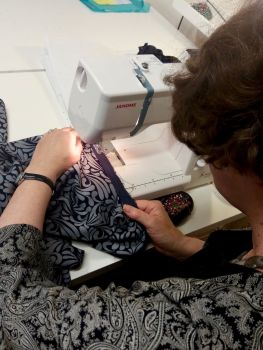
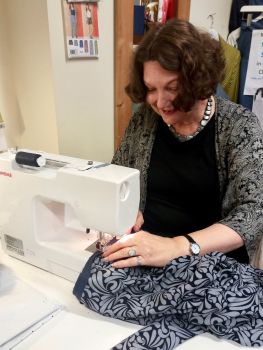
    Cutting out my new slippery crepe fabric was really difficult so I was advised by Kat, the teacher, to use lots of pins close together to help hold the shape - a very helpful hint!
     
    Prior to sewing the garment together, the neckline was machine stitched to prevent the fabric from stretching.
     
    On the original tunic the seams were first sewn together and then overlocked,  so this procedure was adopted for the new garment, thereby providing a neat, fray-free finish.
     
    I then secured the neckline with matching bias binding to create a neat finish.
     
    20180829_192157          20180829_192215
     
     
    The hemline of the garment was marked out by Kat with the use of a practical device which delineated the bottom line of the hem measured from the floor in chalk.
     
    I decided to hem the bottom of the tunic and sleeves by hand.
     
     IMG_9195
     
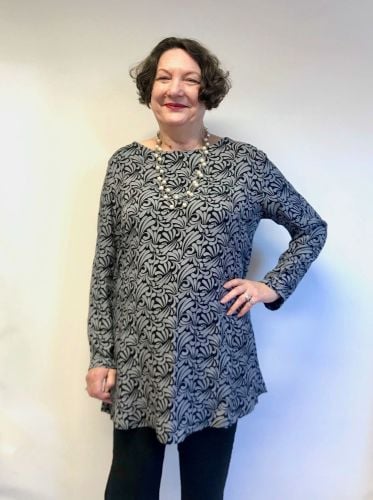
    The finished article looked wonderful.  But the crepe fabric I had chosen, had more give in it the dezore fabric of the original garment, so it felt slightly roomier.  The neckline had stretched slightly when I put the binding on and we remedied this by making a coupld of tucks at the front which actually looked great and even improved the design.
     
    Kat recommended if I were to make it again to use fusable or sew-in stay tape before applying the binding to stop the neckline stretching at all.  Not all fabrics need this apparently, stay-stitching is often enough but I had picked a fabric with a lot of give in it.
     
    All of these things have added a new learning curve to my skills and i'm pleased with my new top.  I'm delighted to have the pattern so I can make some more at home.
     
    Jacqui made her top in a few of our weekly Stitch Classes.  Find out more about them here.   
     
    You can also learn these skills in our 1 day workshop - Replicate Your Clothes. 
    View more info/book here
     
    Contact us here with any questions!
     
  6. How I made my own dress from just a picture. Jacqui Rush - Student Blogger Series

    Posted on

    Jacqui Rush dress project-06

    I wanted to recreate the style of the dress in the picture on the right but wasn't sure where to start.  I've done a bit of sewing before in the past but that was many years ago and I wanted to do something creative again. I love the 1940's style and it's hard to find vintage garments in my size, so making my own clothes was the perfect solution!

    I started my project in January 2018. I came to the first lesson with Kat in Sew In Brighton's Stitch! General Sewing & Clothes Making Classes in Hove. These are on several times a week so I could fit them round my personal schedule. I arrived with with just:

    • a picture of what I wanted to make - a 1940s style day dress. It had a side button detail (that you see in the illustration above on the right). I'd printed it from Pinterest
    • some calico
    • and lots of trepidation!  However I was made very welcome and first day nerves were soon dissipated in the friendly, cosy atmosphere of the Sewing Lounge.

  7. Guest Blogger: Leigh-anne's wrap dress project

    Posted on

    Stage 1 - 21/03/2018
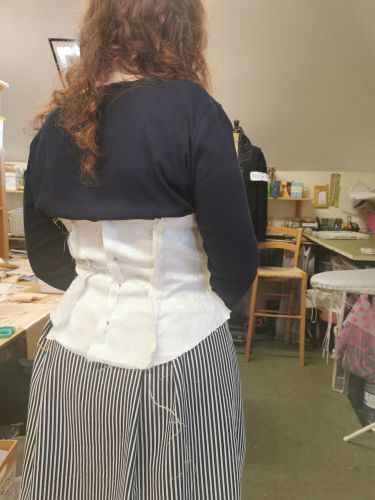
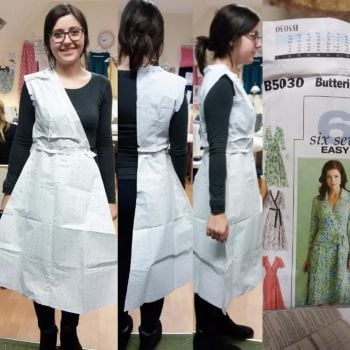
    I have been wanting to make my own wrap dress for a while now and with spring/summer approaching I thought there’s no better time than now.  I have chosen dress style C from the Butterick B5030 Pattern.  After looking at few patterns, this one appealed to me the most as it has six different versions of the dress which gives the flexibility to cater to different styles.  In particular, dress C was the closest to what I was after.

    I decided not to cut the pattern supplied directly as I wanted the option to make the different versions/sizes in the future.  So I measured my waist, bust, high bust and nape to waist before selecting my pattern size.  I then compared my measurements to the pattern and chose the appropriate sizing. After tracing and cutting the pattern I did a tissue fitting with help from Kat.  A few adjustments later and it’s now ready for fabric cutting!

    Leigh-anne has been coming to classes for exactly a year today, and has now secured a job at Alma's Alterations in Brighton, congratulations! She also has an Instagram feed showing her sewing journey @madebylaluk

    Leigh-anne wrap dress sewing blog classes brighton hove pattern cutting